(These instructions are for "formeverassistant", the designer/admin utility, for creating new systems)
After running the Install, launch formeverassistant
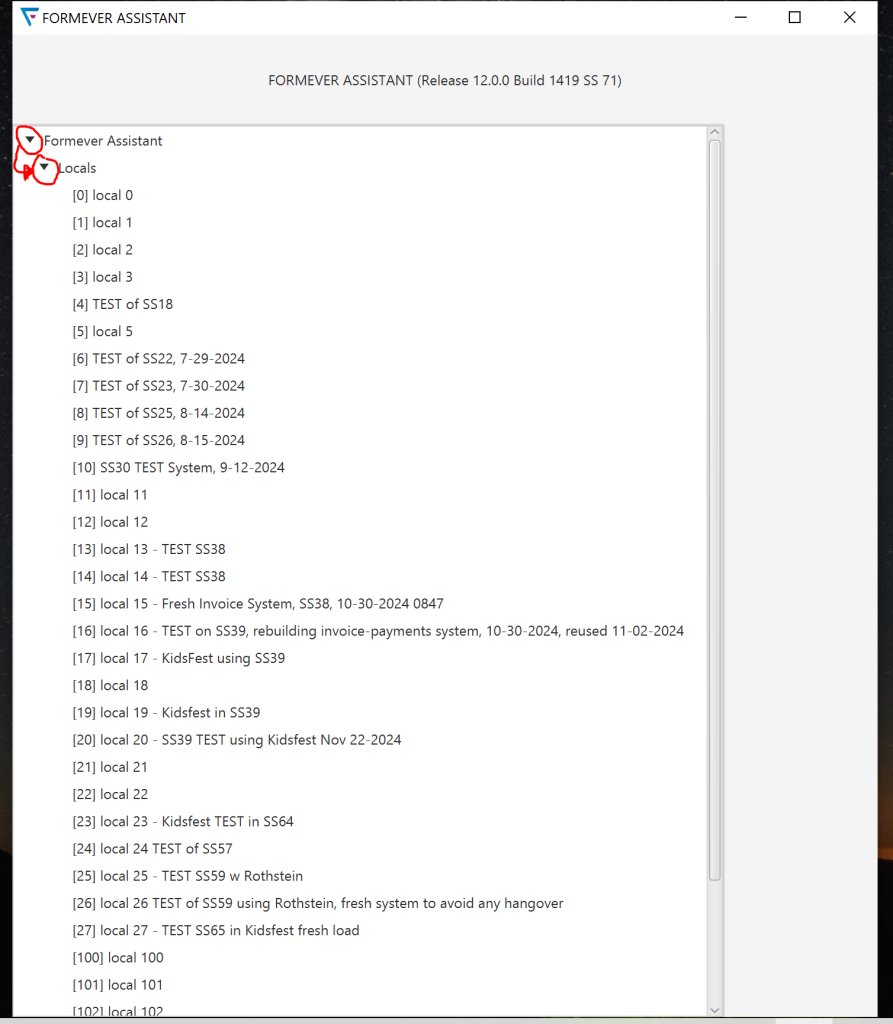
The formeverassistant main menu gives you access to all of the “Locals”. These are systems that run on your local machine (i.e. your PC or Mac computer). This is where you design and shape your system before putting it up on the cloud.
You can work with multiple Locals, so if you have multiple clients you can keep several different designs going at once.
Click on the first “twiddle” to drop down “Locals”, then click on the “twiddle” beside “Locals” to bring up the full list.
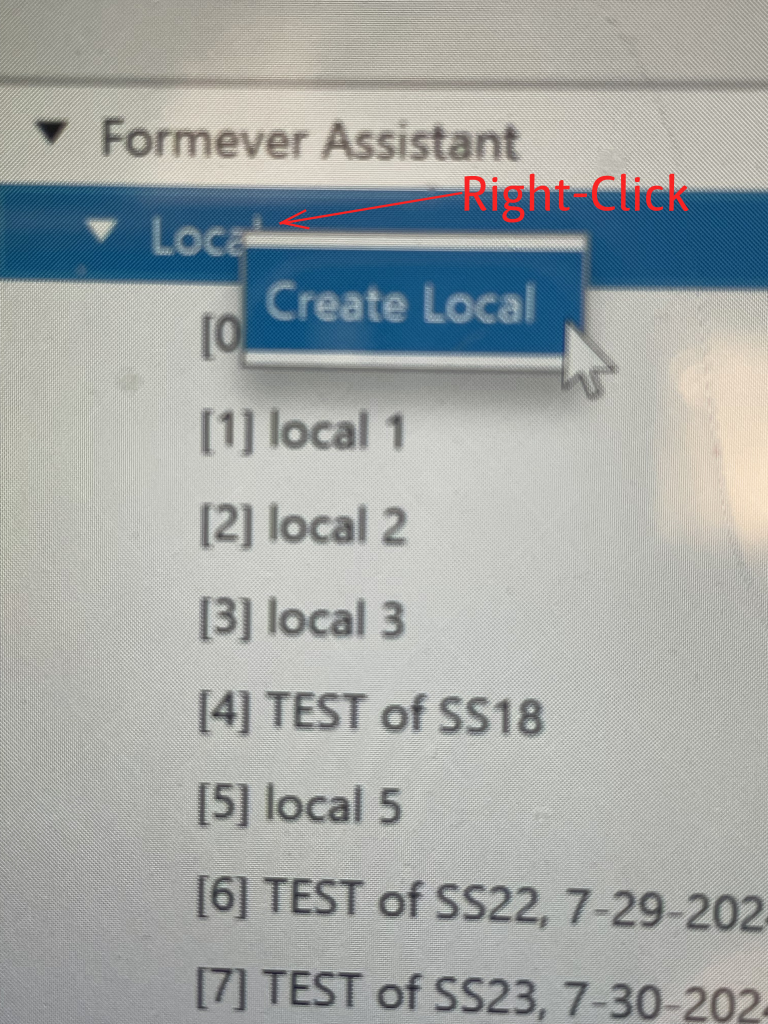
Right-click on "Locals"
This brings up the option to create a new Local. This allows you to create a brand new system.
Select “Create Local” to make a brand new system.
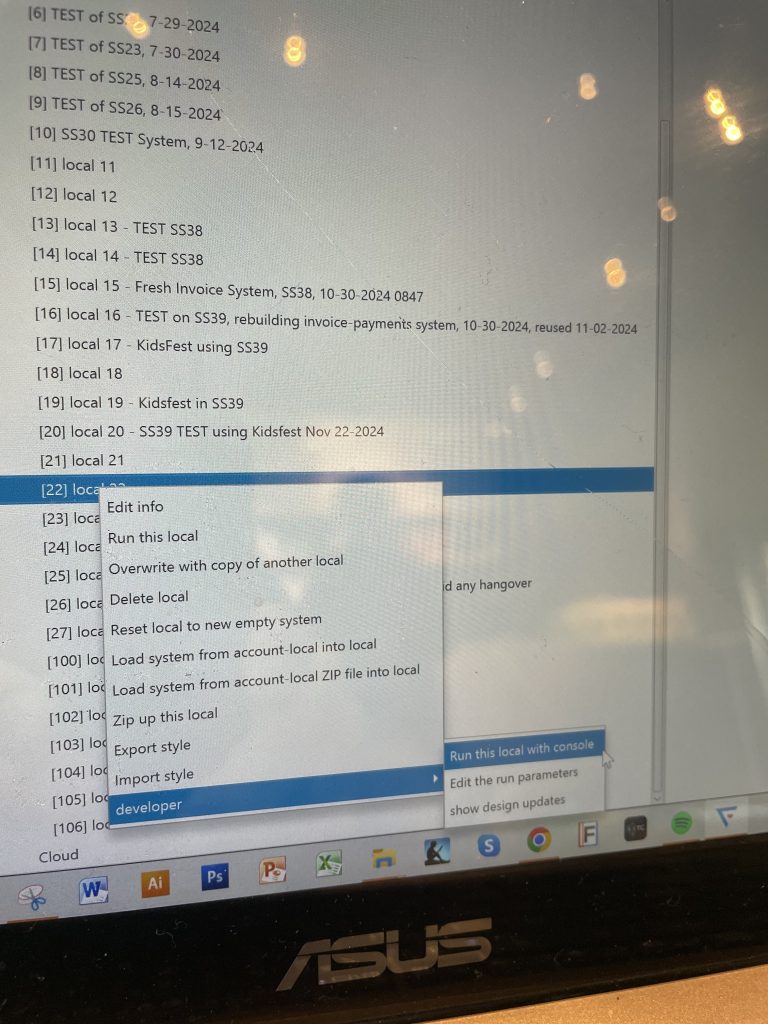
Right-click on your new Local
This calls up a list of options. You can load another system into the Local, or reset the system. In this case, starting a new system, we want to run the system.
There are two run options. Near the top of the menu you will see a straight ahead “Run this local”. That will work, but I suggest you go instead to the bottom of the list, where it says “developer”. This will give you a sub-menu, and you can select “run this local with console”. Running your system in this mode will give you a log while you are working on the system, which can be helpful if you need to report any bugs or issues.
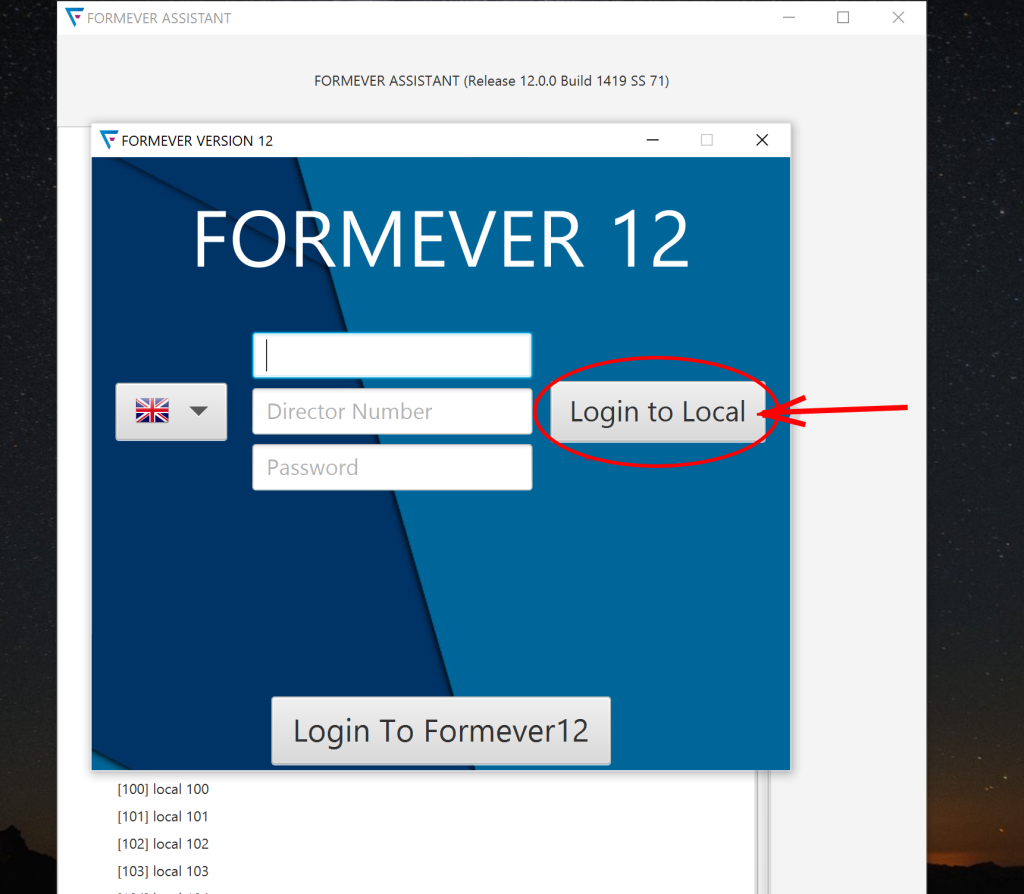
Click on "Login to Local"
The login window that comes up is for login to a cloud system. Since we want to work locally for design, click on “Login to Local” to switch to the Local login screen.
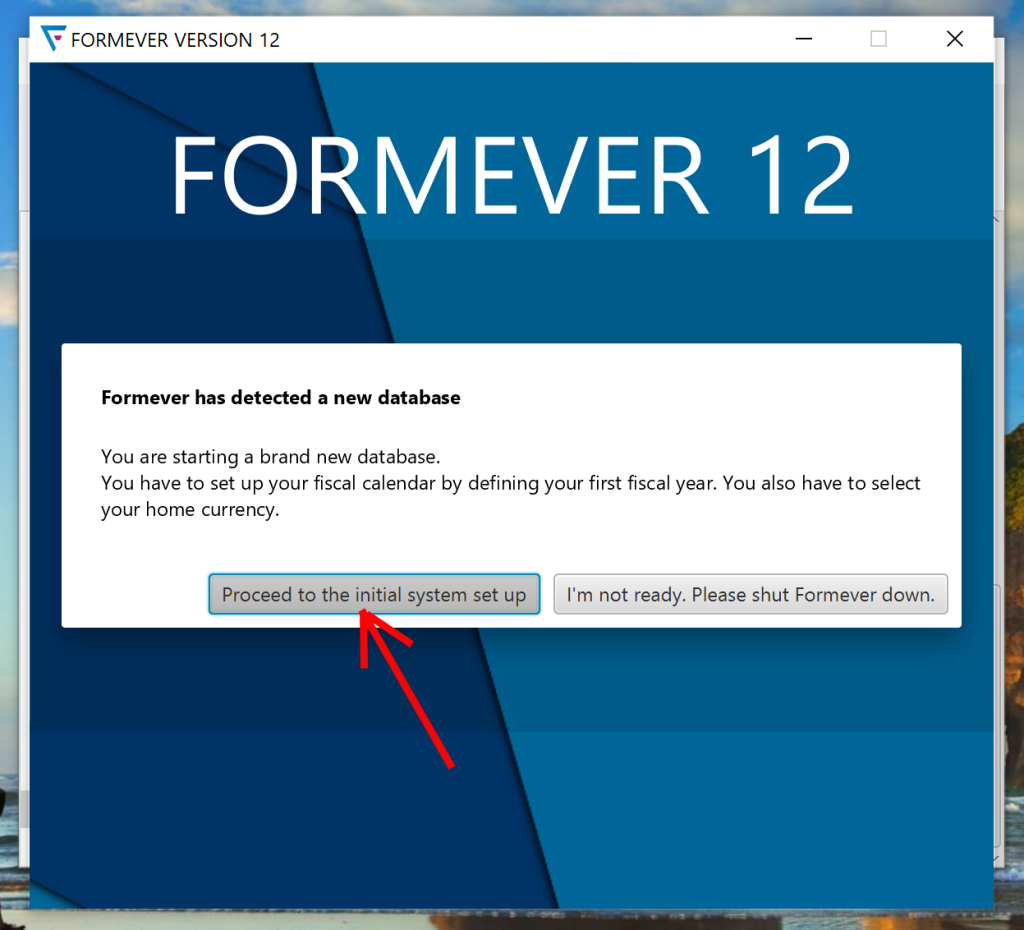
Click on "Initial Set-Up"
When it’s a brand new Local, you need to select some initial settings. Click on “Proceed to the initial system set up” to be offered those settings.
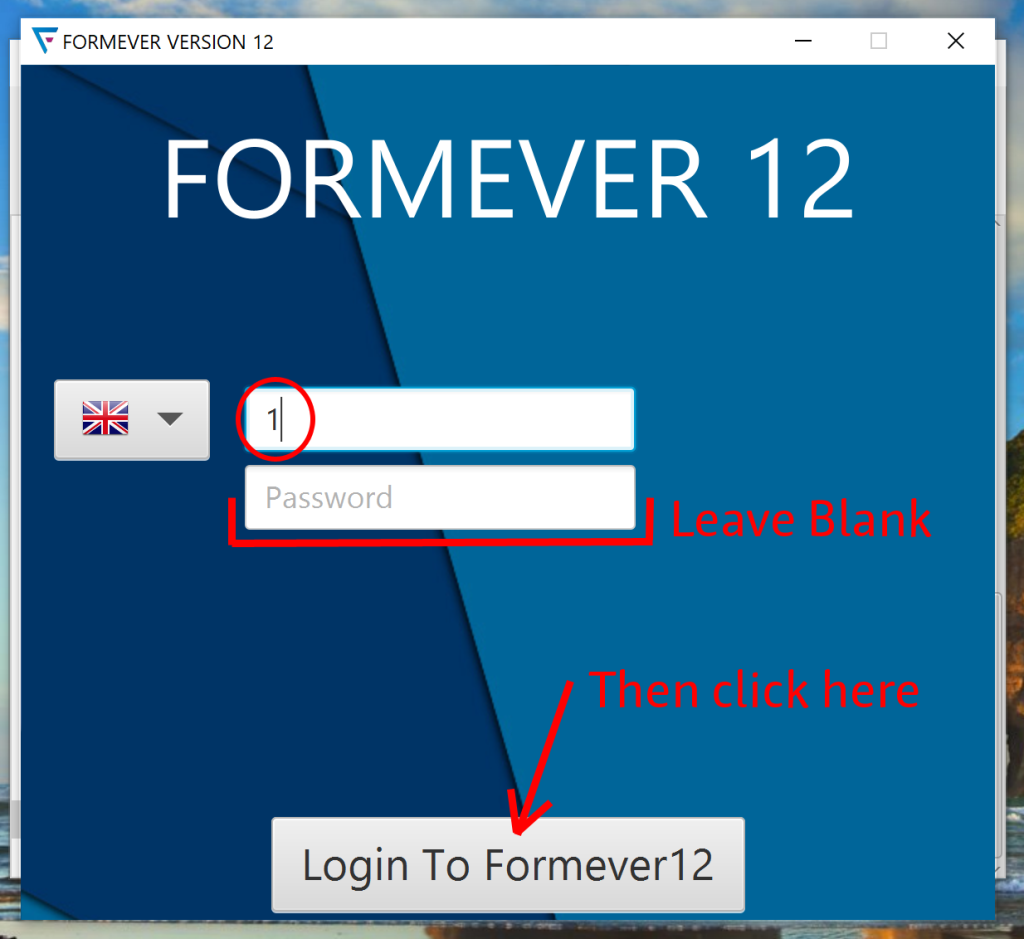
Fill in the Local login screen
In the first field (“Director ID”) enter a “1”. Leave the Password field blank (since no passwords have been set yet), then click on the “Login” button.
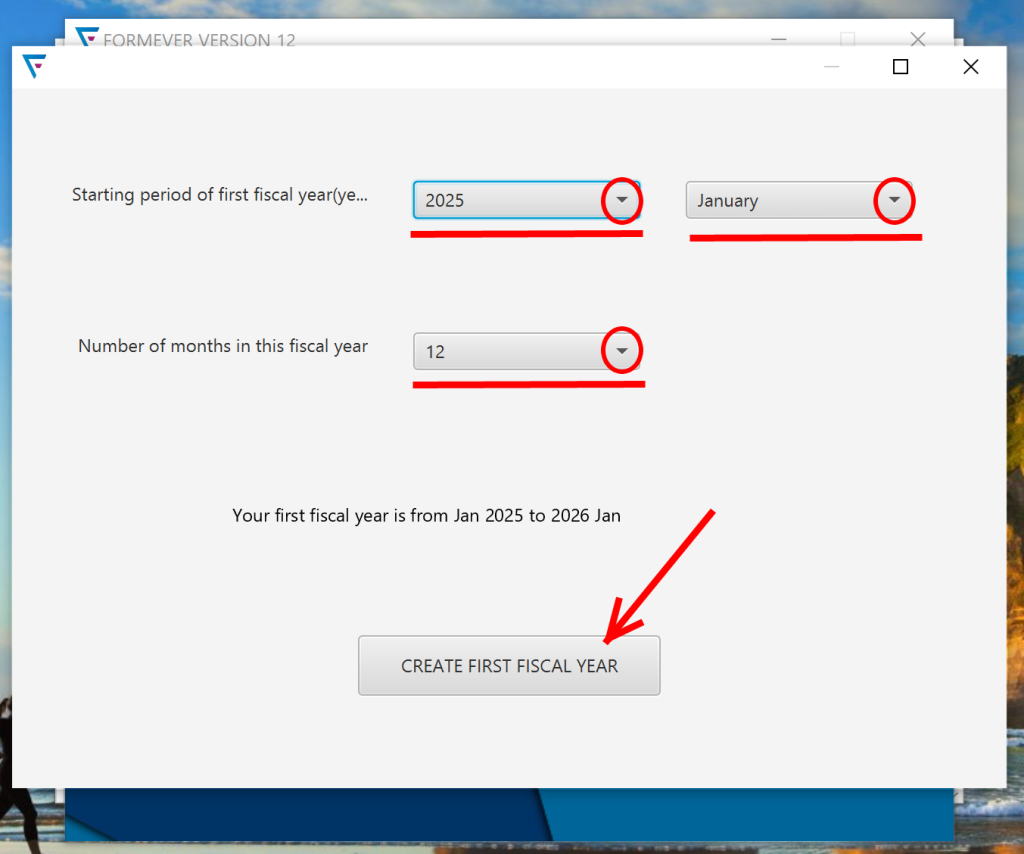
Select your first fiscal year
Formever utilizes an underlying structure that organizes things in fiscal years, so you you need to set the first fiscal year for the system. Once the first fiscal year is set, it’s not possible to go back before that, so we recommend putting at least one year before the first year you plan on entering data (e.g. if your firs year for data is 2021, then make 2020, or earlier, your first fiscal year. This provides a contingency in case it turns out you need to enter something that precedes the rest of your data.
Fiscal years can be adjusted to meet your client’s / your company’s particular calendar, so you can start it in any month, and you can set a long or short year (more or less months) if the company is adjusting it’s fiscal calendar to a new start month for the year.
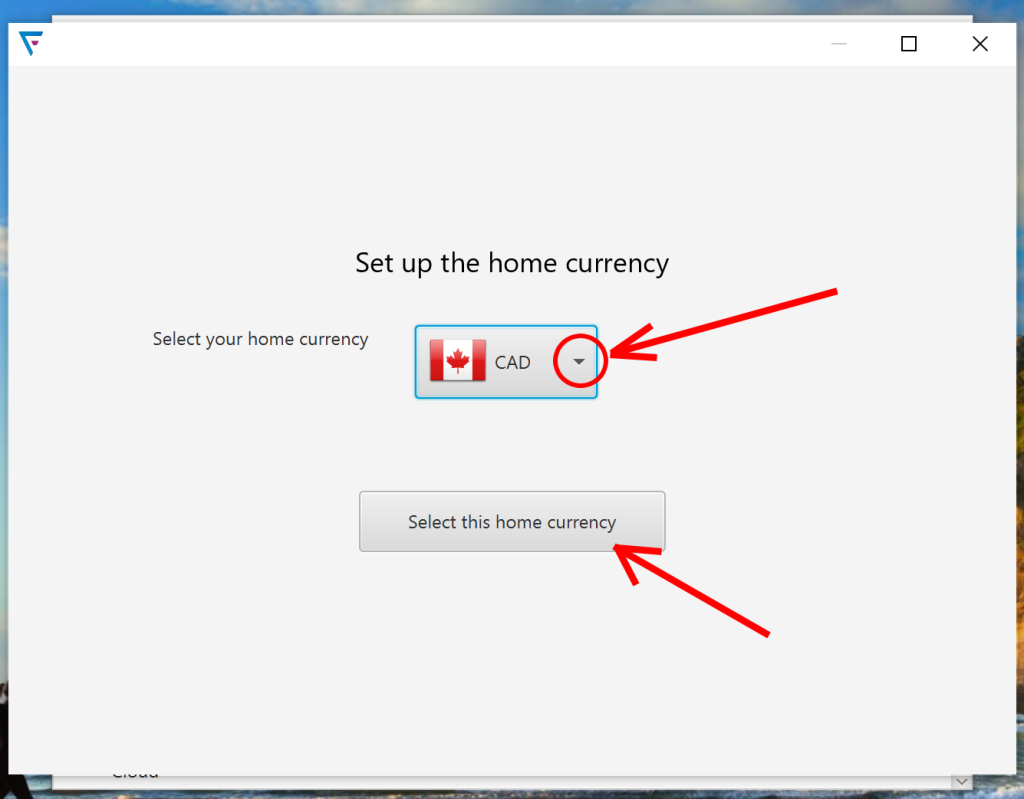
Set your "home" currency
Formever needs to know your “home” currency. That is the currency in which allthe client’s / company’s books are kept. You might not use ny of the accounting functions in Formever, but it needs to be set in case the functionality is added later on.
Switch to a specific period to begin designing
Once you’ve confirmed your currency choice, you’ll be taken to the admin screen. To begin designing your system, you’ll need to switch to a specific period (i.e. a specific month within a specific fiscal year). We recommend starting your design in the “year start period” (YSP) of the first fiscal year in your system.
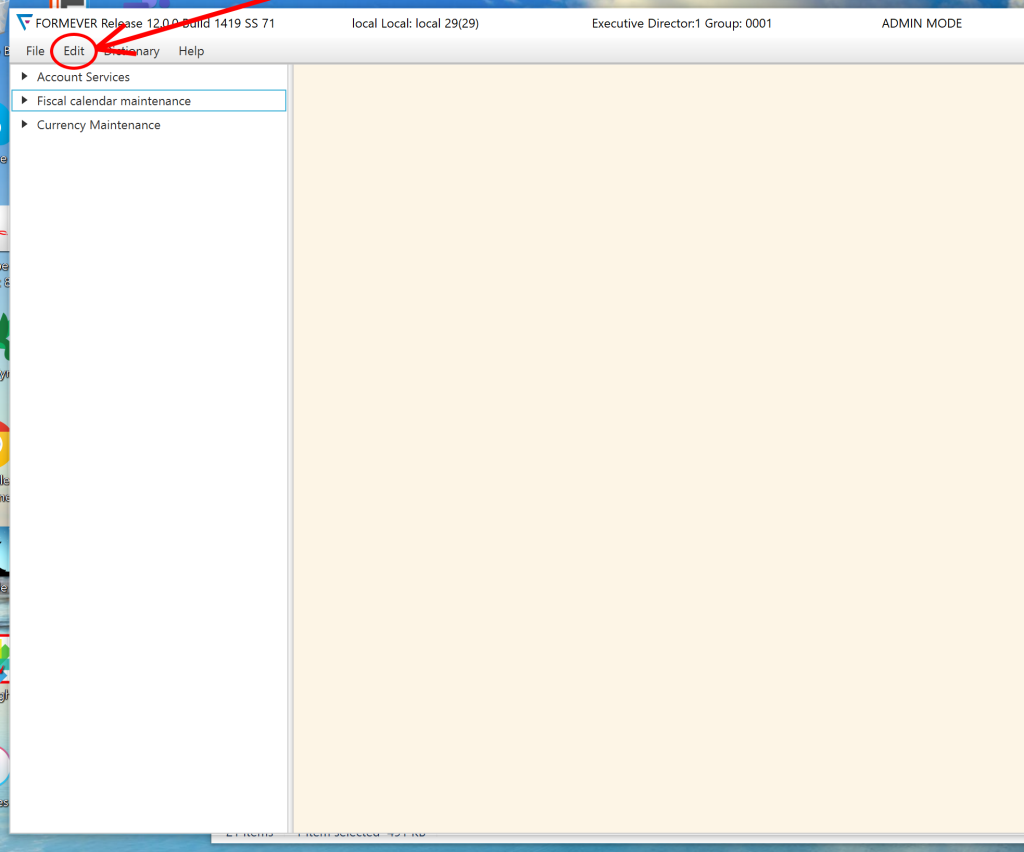
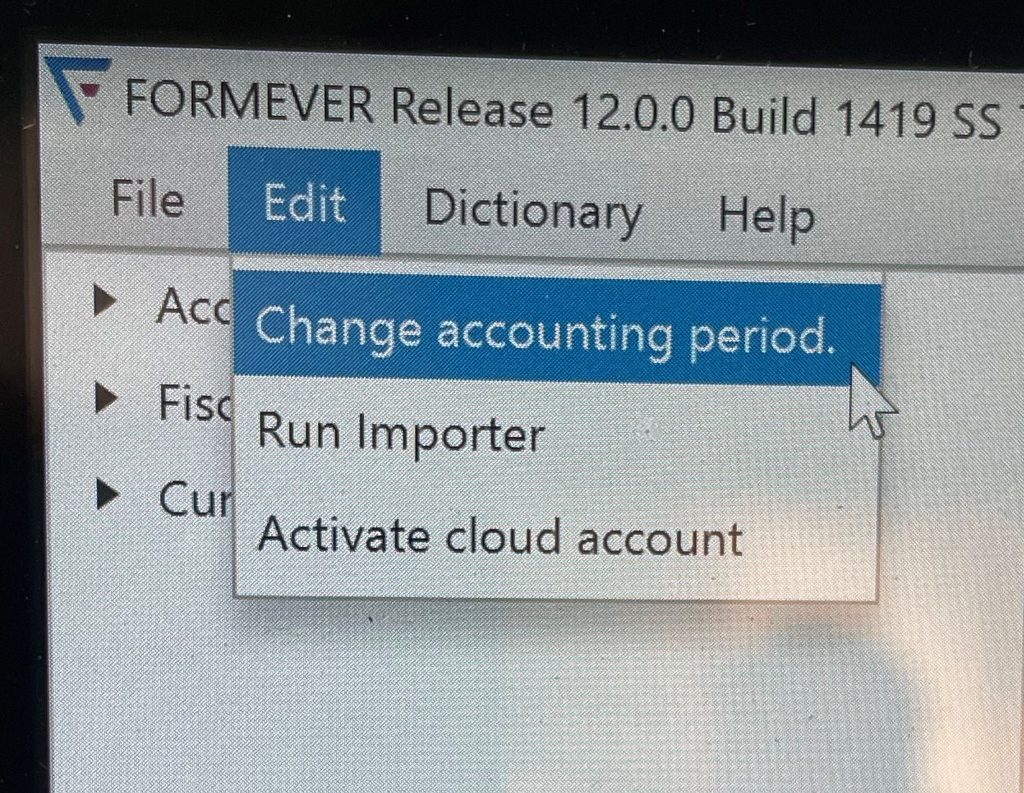
To select a specific period, click on “Edit” in the menu bar.
From that drop down menu, select “Change accounting period”
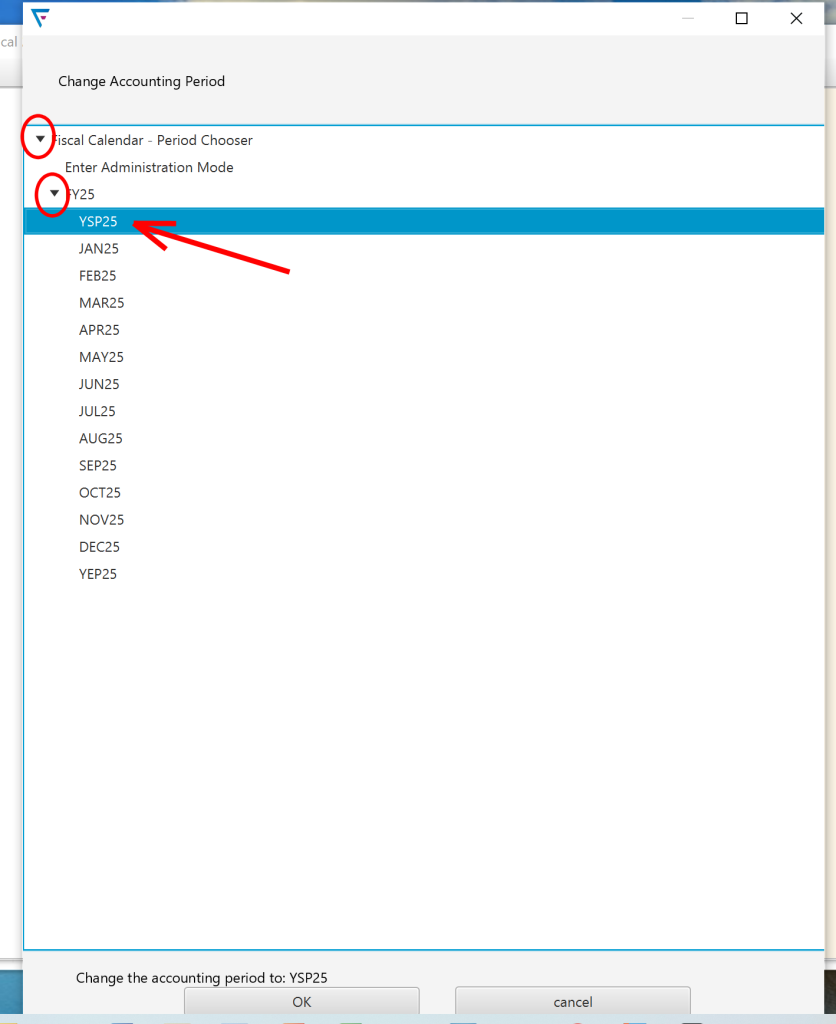
This will bring up the window for accounting period selection.
Select the fiscal period to move to
In the Fiscal Period Selection Window, pick the iscal period you want to move to.
In this case, year start period of fiscal year 2025 (YSP25).
Note: If you’re having trouble seeing the “OK / Cancel” buttons at the bottom of the window, re-size the window a bit, and it should bring them into view.
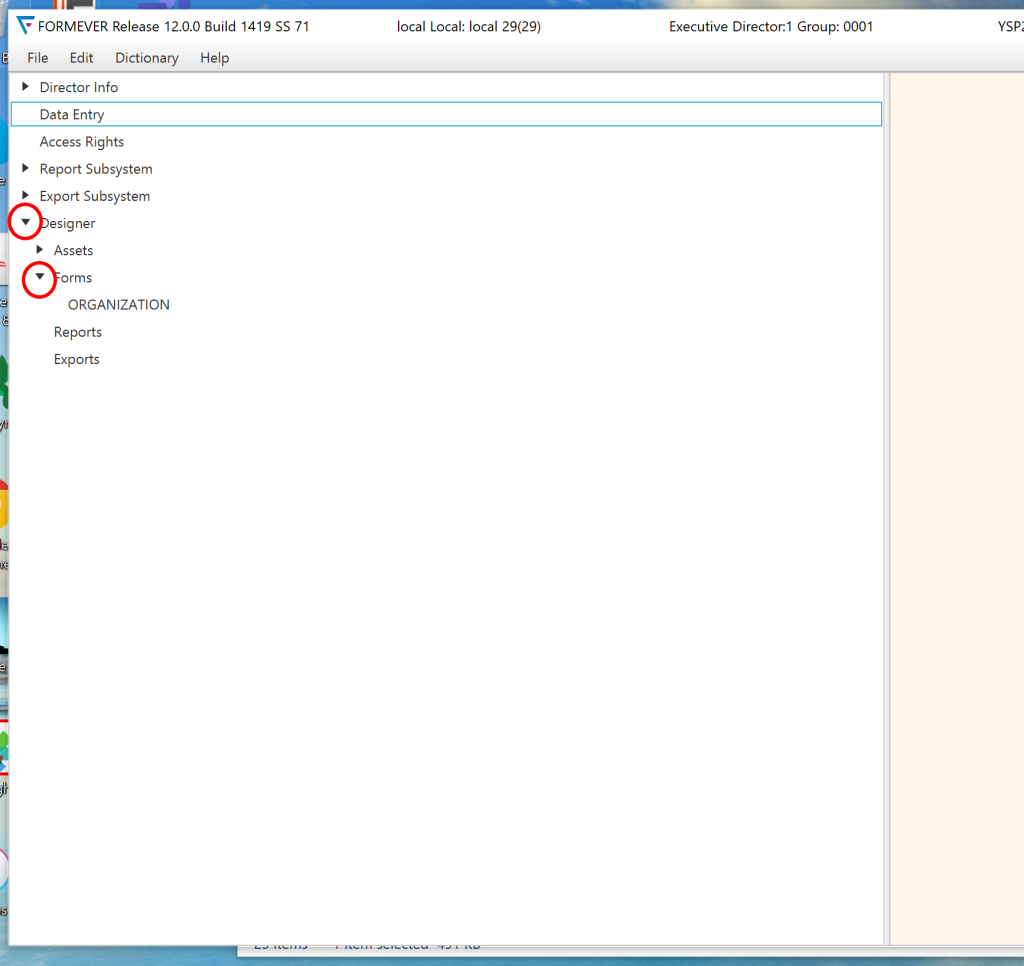
Open the Form Design section
Begin by designing a Master Form. This is a template for data entry.
To open the Form Design section, select the “twiddle” for the Design area, then select the “twiddle” for Forms.
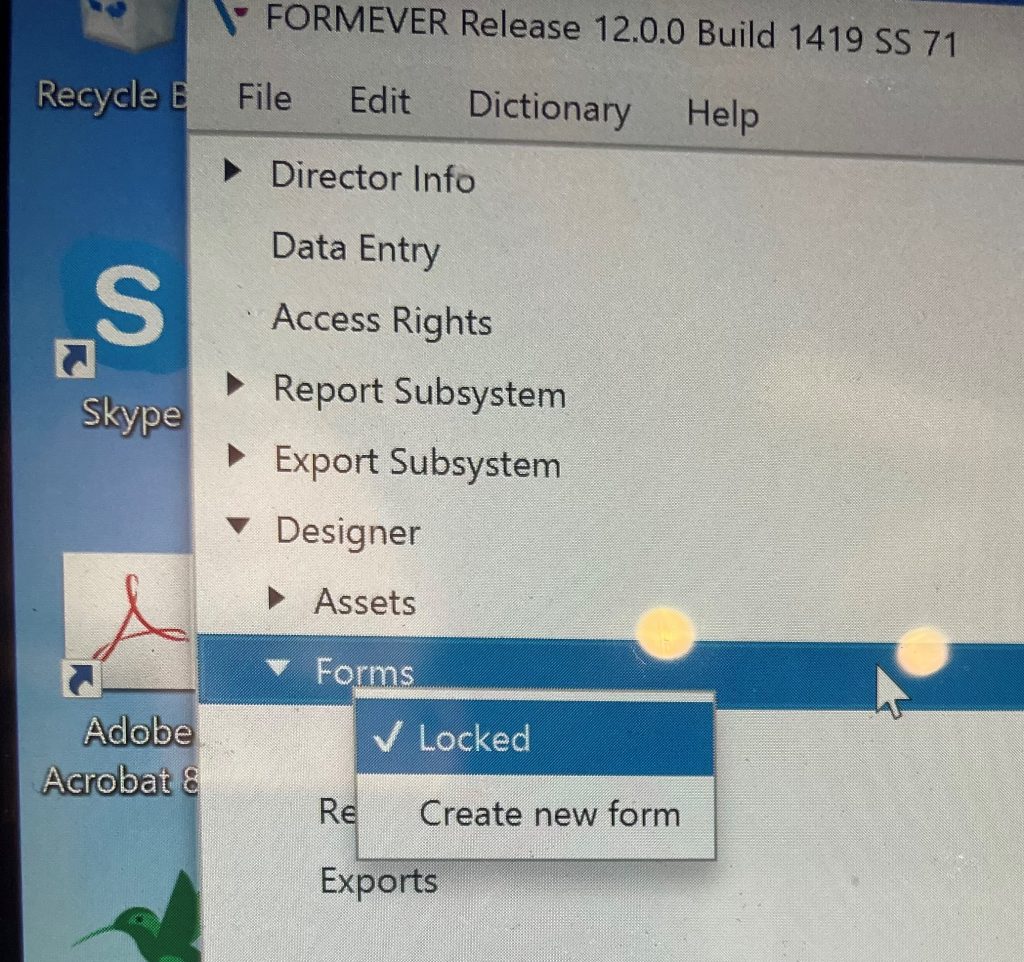
Unlock form design
Rght-click on forms. Form Designer starts in “Locked” as a default.
Click on “Locked” to switch it to “Unlocked”
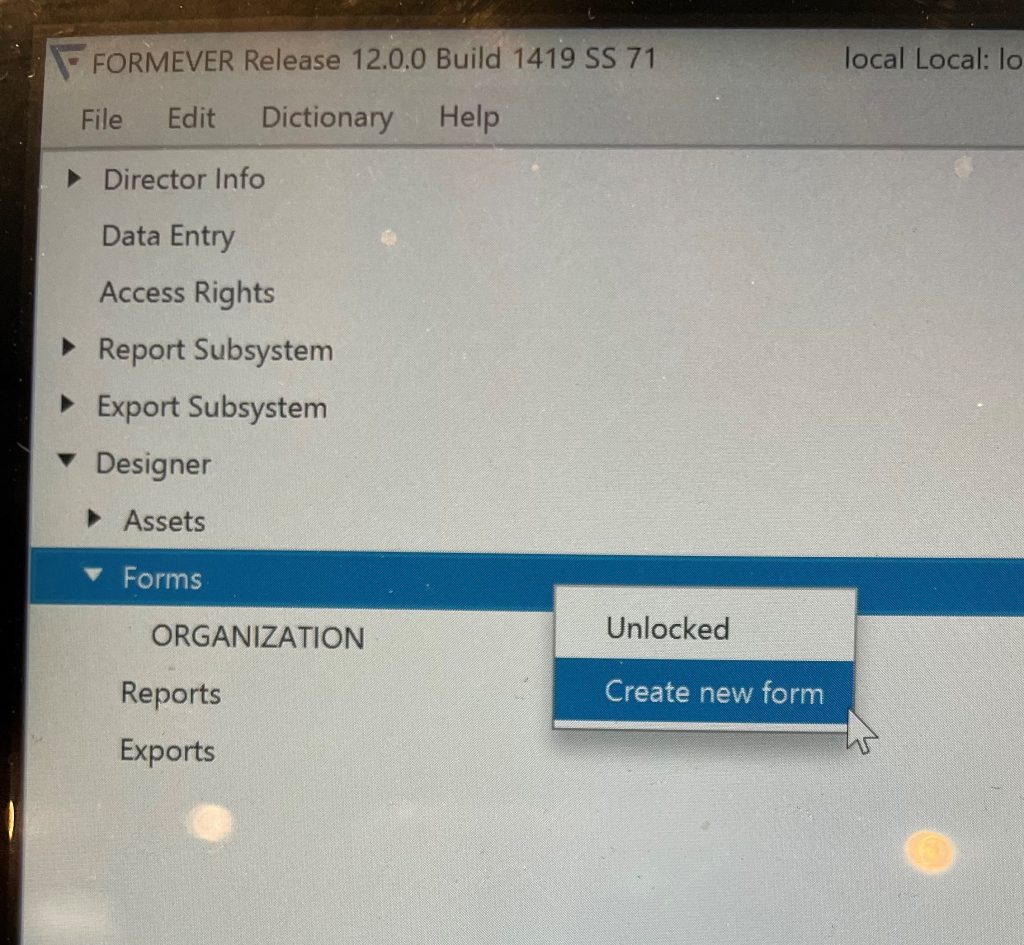
Select "Create new form"
Right-click on “Forms”, and seect “Create new form”